
Capture
This section explains how to capture chamber and site imagery in Trace Intercept.
The guidance below reflects common leading practices for effective capture using the platform. Your organisation may define additional procedures, approval requirements, or capture standards. Where internal guidance exists, it should be followed.
Purpose of Capture
The objective of capture is to create an accurate, structured visual record of a chamber and its surrounding context that can be:
• Reviewed remotely
• Shared across teams
• Compared over time
• Used for condition assessment
• Used for optional reconstruction (if enabled)
Effective capture reduces the need for repeat site visits and improves shared understanding across stakeholders.
Overview of the Capture Workflow
A typical capture process includes:
- Prepare equipment
- Capture chamber imagery
- Capture drone or surface context (if required)
- Upload media
- Structure shot sequences
- Orient imagery correctly
Reconstruction and calibration are addressed separately and are only required where specified by internal work orders or procedures.
Preparing to Capture
Before starting capture:
• Plan your visit by reviewing the asset in Trace Intercept
• Obtain one of the Trace Intercept capture kits for your area
• Ensure camera and light array batteries are charged
• Confirm sufficient storage capacity on the SD card
• Confirm any required permits or site approvals
This guide does not replace internal safety procedures. Always follow your organisation’s operational and safety requirements.
Capturing Chamber Imagery

Trace Intercept chamber capture is designed to create consistent vertical image sequences suitable for remote inspection and optional reconstruction.
Leading practice:
• Assemble, position and weight the tripod
• Attach the 360° camera and light to the cord
• Turn on the light
• Connect to the camera from your organizationally provided device through the organizationally approved and downloaded software
• Position the camera 0.5m above the entrance and take the first image
• Capture imagery at regular vertical intervals (commonly every 0.5m)
• Continue to the base of the chamber
• Enable video recording
• Start pulling the camera up
• Move slowly in the chamber itself and near complex or significant features
• Capture video until 0.5m above chamber opening
This process will enable you in your role to see things important to you and your organization, so take advantage of it.
Where possible, capture should be efficient enough to avoid unnecessary traffic management, unless site conditions require otherwise. The choice of overtime for out of hours capture or engaging traffic management is a decision your firm will make for how it chooses to perform this.
Capturing Surface or Drone Context
Surface context improves situational awareness and map alignment.
Operating a drone in the UK requires an individual operator's license even if the drone is registered under your employer's firm. Ensure that you have completed this process. The UK CAA page for doing this is here, but your organization may have a specific process and training aligned with this, and if so, that should be followed.
When using the drone:
• Capture from sufficient height, 70m being recommended, to establish site context
• Include recognisable landmarks
• Ensure chamber lids are visually identifiable
• For asphalt surfaces, temporary marking may improve visibility
• Capture overlapping images for larger sites
Drone use must comply with applicable aviation and organisational policies. See this UK CAA page for guidance.
Uploading Media
Once back on a wifi connected device:
- Select the correct marker in the map view
- If uploading drone imagery or if the chamber wasn't already in the system, create the marker from the marker button.
- Unlock the marker by clicking on the small lock symbol
- Upload images and video
- Allow video uploads to complete in the background
- Confirm all expected files are present
Large video files may take time to upload. Upload can be left to complete without further interaction. Your organization may have set aside a workstation in your primary work location for this purpose.
Structuring Shot Sequences
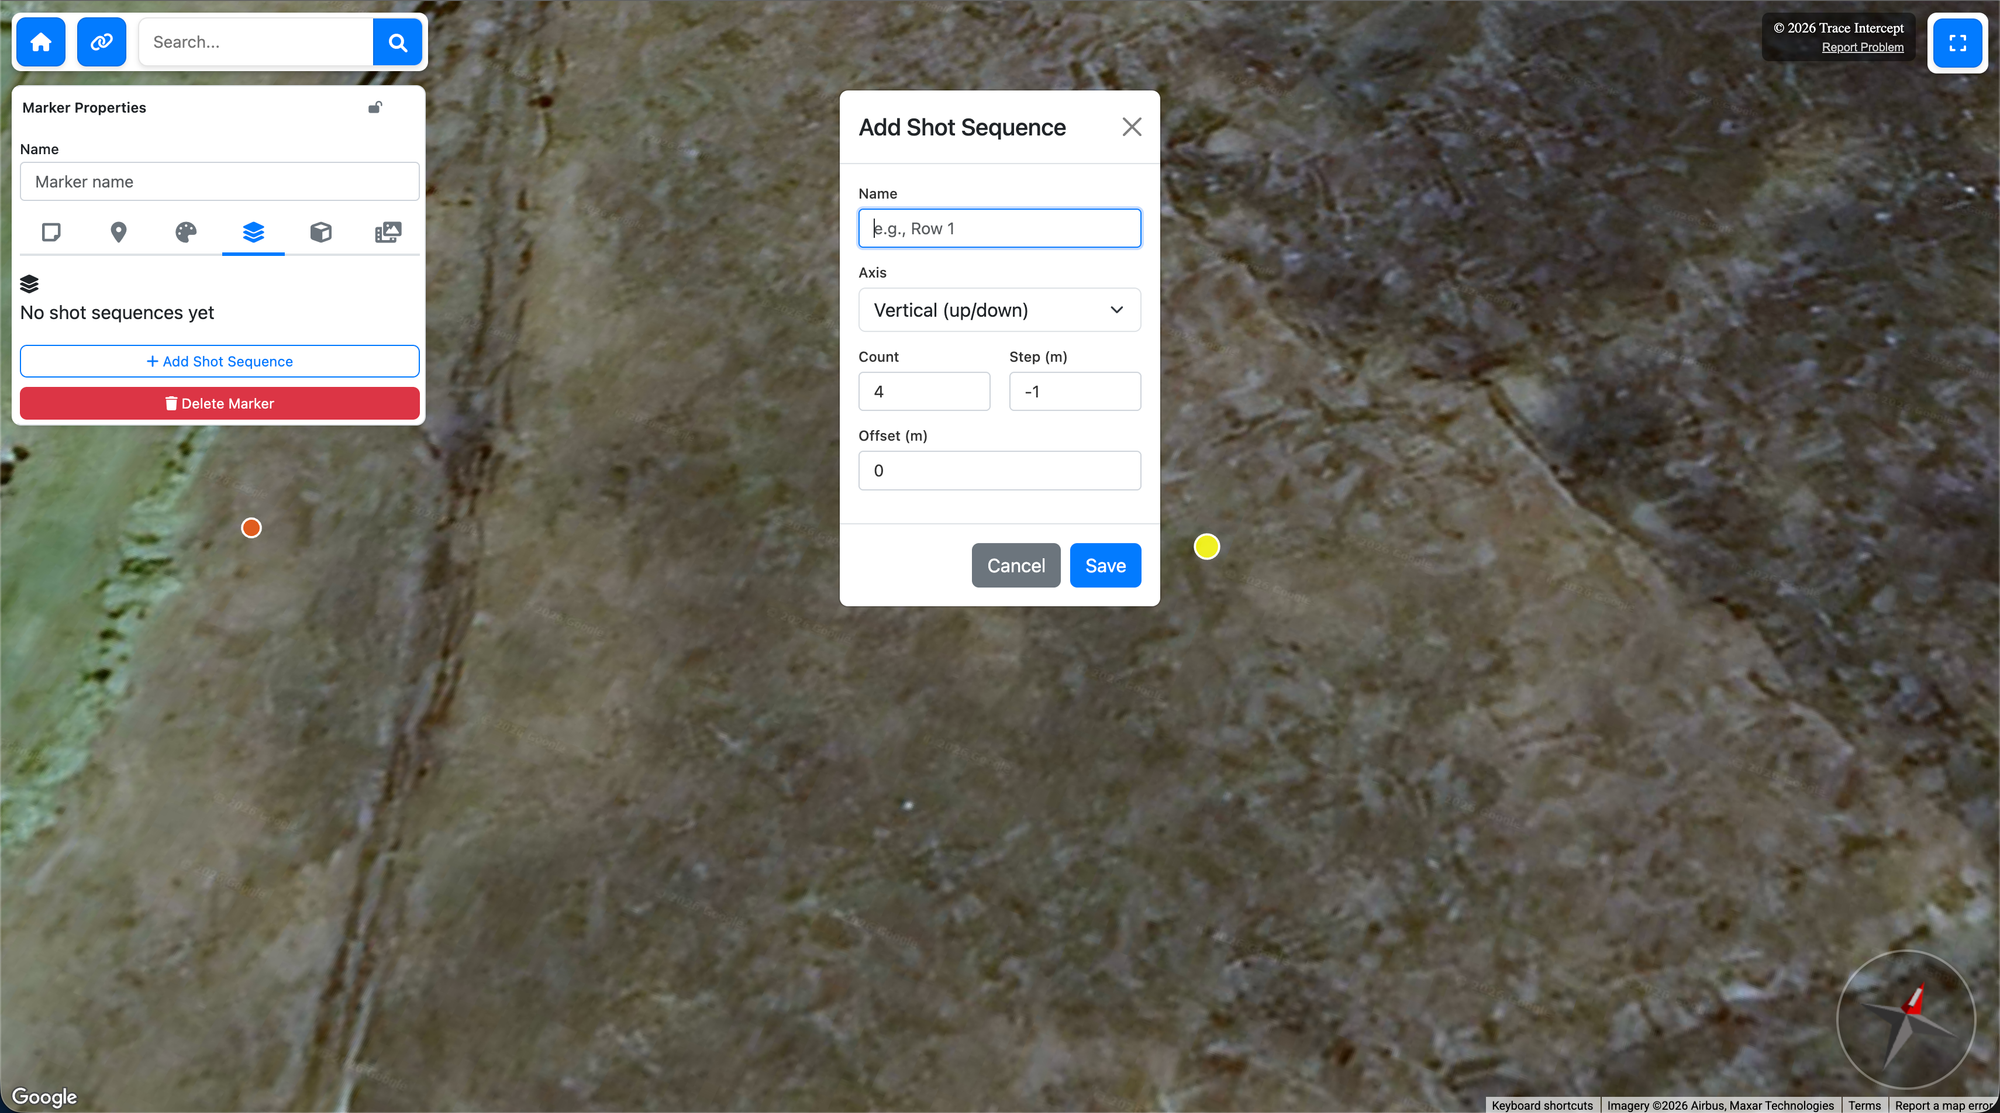
Shot sequences organise images into a logical vertical or horizontal progression.
After upload:
• Create or select the appropriate shot sequence
• Adjust image order if necessary by dragging images up and down
• Confirm vertical progression reflects real-world capture
If multiple captures exist over time, ensure the new sequence is correctly dated.
Consistent structuring improves inspection and comparison.
Orienting Imagery

Orientation recreates real-world alignment inside the platform.
This should typically be performed by the individual who captured the imagery, as they have direct ground truth context.
Using the orientation tool:
• Unlock the image
• Align North with the map
• Confirm vertical alignment
• Confirm inlet and outlet flow directions are visually accurate
• Lock orientation once complete
Correct orientation improves interpretability and reduces errors during review and collaborative sessions.
What Good Capture Looks Like
Effective capture produces:
• Clear, well-lit imagery
• Consistent vertical progression
• Correct map alignment
• Accurate real-world orientation
• Structured shot sequences
• Context imagery where relevant
The result should allow a remote reviewer to understand the asset without returning to the site.
When Reconstruction Is Required
If the Reconstruction module is enabled for your organisation, and if required by internal work orders or SOPs:
• Capture quality directly affects reconstruction accuracy
• Smooth, slow pulling up of the camera is important
• Slowing and even stopping pulling of the camera in the chamber and around complex elements is important
See Advanced for guidance on reconstruction and calibration.
Common Issues to Avoid
• Inconsistent vertical spacing of 360° photos
• Poor lighting
• Rapid camera movement
• Incomplete capture to chamber base
• Incorrect orientation
• Misordered shot sequences
Taking a few additional moments during capture reduces the need for rework.
Next Steps
After capture is complete:
• Proceed to Inspect to review imagery
• Use Collaborate to share with stakeholders
• Use Evidence to document findings
• See Advanced if reconstruction and calibration are required
Choose Your Starting Point
If you are rolling Trace Intercept out → Start with Enablement
If you are preparing for a site visit → Start with Plan
If you capture assets → Start with Capture
If you review assets → Start with Inspect
If you run joint sessions → See Collaborate
If you provide formal documentation → See Evidence
If reconstruction is enabled → See Reconstruction
If you are considering process change → See Transformation
If you have questions → See FAQ
Still need help? → See Support & SLAs